
Linking up with Craft O Maniac, Making the World Cutere, Skip to My Lou, and Show and Tell Monday - links in my side bar.
Be sure and take a peek at all the other projects - there are some fun things!
~~~~~~~~~~~~~~~~
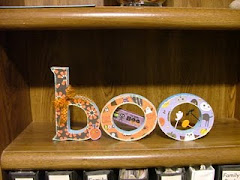
I saw this over at Pink Paislee and thought it would be a perfect hat to go with my "Witches Kitchen" - it is so cute with everything!

I tried to take a few pictures as I was making it so if any of you want to make one, it might be easier for you.
Step One - Supplies - I wanted to use what I had so it was a little tricky.
- I used one sheet of 12 inch square paper, it would have been easier with 2, but I did it with one. I cute the strip into 3 inch by 12 inch strips.
- I cut the brim out of another sheet of paper and used a dinner plate for the pattern.
- I had a styro cone so I used it - it is about 15 inches tall. I think it might work better with one of those chip board cones, but either will work.
- I used 3 other paper scraps that were Halloween.
- I used 1 inch ribbon for the bow, a plastic spider, some florist balls, and some spider glitter stickers. You could use anything you have to cutsey it up and embellish it.
Step 2 - The Cone
- After gathering my supplies, I sewed the edge of the strips and the brim with a zig zag on my sewing machine. The paper is purple and the stitch is orange.
- Then I hot glued the paper on the cone, starting at the top and working down.
- Then I glued the cone to the brim.


Step 3 Shaping
- This is a Mod Podge Project - I didn't know that until this step. I realized I needed help to get this to shape and look finished, so I mod podged it everywhere. The one I saw wasn't mod podged and it looks so much better with that on it.
- Then I broke the cone at the top and the paper tore. I cut a little strip of the paper and mod podged over the tear and it is so cute! I curled up the edges of the brim and with the mod podge they stayed up.

Step Four - Embellishing
- I used 3 different papers to embellish with - I had some cellophane so it was the under layer. Then I accoridan floded some yellow paper and glued on top of that. Then I had some dark purple paper and I tore it to giv eit a different edge and wadded it up, soaked it in mod podge and put it on top of the orange and on the brim. (see picture below to see what I mean)


- Then I added berry pick that I cut up, a bow, some glitter sticker spiders, a dangling spider from teh hat and a Happy Halloween Sign. After it was all dry I put a light dusting of irridescent glitter on it - PERFECT!

Doesn't it look great in my Witches Kitchen area?
http://www.%20pinkpaislee.com/


4 comments:
Yay! It's darling. I absolutely love it.
So cute! It would look awesome on my table.
Tami
What a cute idea!! :)
I love this. How totally adorable!!!
www.makingmemorieswithyourkids.blogspot.com
Post a Comment