 Hope you have a fun Halloween!
 We will see you in 2010!
 Hope you have a fun Halloween!
 You can come and sit a "spell" in our living room. You will see the witches that have gathered on the fireplace, the village and the decorations on the piano.
 This is the centerpiece on the top of the piano with all kinds of ghosts and goblins hiding in the leaves and behind candles. Yes those are M&M's in the tall vases and candy corns holding the candles.
 On the east wall is our "Spook-tacular" Halloween Village. It is filled with all kinds of memories with all the goodies that we have made every year as a family over the past 30 years. I love the ghosts with the ninja turtle masks painted on them and the witches with mascara and lipstick!
 At night with the lights
 Let's creeep down the hall and go into the dining area....
 Here is Frankie - our Halloween tradition! Isn't Halloween without him!
 From here you can go left in to the terror-ific powder room......(you will be surprised when you realize the curtains here and in the kitchen are made with shredded black plastic bags)......
 If you turn right you will go into the dining/ family area. Our houe isn't haunted but it is fun! We have beoo-tiful decorations (not too creepy). In the dining room is Grandma Mimi's Witches Kitchen. This is a fun place that help the little boys that call us Grandpa and Grandma scream with delight because of goodies they find here and the fun thngs they have helped us make find their home here.
 A few pictures a little closer up


Dining Table Cetnerpiece I love "I Spy" vases with all kinds of goodies in them.

I guess it is time for you to go now.......thanks for stopping in. You need to go through the entry on your way out.

BYE! Come again!!
 BUTTERBEER RECIPE~
 Ingredients:
Directions:
Step 1: Measure butterscotch and butter into a 2 cup (16 oz) glass. Microwave on high for 1 to 1½ minutes, or until syrup is bubbly and butter is completely incorporated.
Step 2: Stir and cool for 30 seconds, then slowly mix in club soda. Mixture will fizz quite a bit.
Step 3: Whip Heavy Cream using an electric mixer until thickened, but not completely stiff (about 2 minutes) Spoon over drinks.
Serve in two coffee mugs or small glasses; a perfectly warm Hogwarts treat for two!

 Invisible Suckers
Melt 1/2 cube butter in saucepan. Add 1/4 cup canned milk and stir. Add 1/2 package of marshmallows and melt. Pour over 12 cups popcorn and stir. Either let sit for carmel corn or form into popcorn balls.
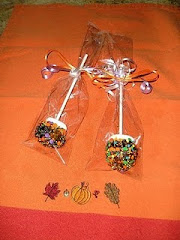
 Marhsmallow Pops are a delight for any "spook-tacular Halloween party.
Put a stick in the flat end of a large marshmallow. Dip the other end in melted chocolate. roll immediatly in small candy or some kind of Hallween sprinkles. Let dry then package in cellophane bags.

Scare up some dipped Rice Krispie Treats.....
Make treats following insturctions on box and let dry well. Cut into squares, spear one end with a popscicle stick. Dip into chocolate that has been melted. Sprinkle with Halloween sprinkles. Let dry and wrap in cellophane bags with Halloween colored ribbon
 Stir up some dipped pretzels.....
Make or buy pretzels. Dip in melted white or chocolate chips. Sprinkle with Halloween sprinkles or mini candies.
 Square Popcorn Balls
I had never heard of these, but we made them and they are a kick! Sure to please all your little ghosts and goblins.

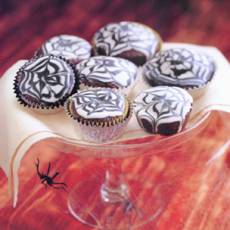
Cupcakes are a great classic!
Make them and frost in your favorite Halloween colors, such as orange, purple and green. Use fun candy such as wax lips and fangs, licorice laces, red hots, gumballs, jimmies & sprinkles, candy corn, gummy worms, and chocolate coins.
Lots of Halloween Cupcake Decorating Ideas Here!
Scroll down for some more yummy treats!
No matter what you do, your family will love all the tricks you do to make them Halloween treats!
Today is a Beautiful day …hope you can enjoy every minute!!!


Step 2 - The Cone


Step 3 Shaping

Step Four - Embellishing


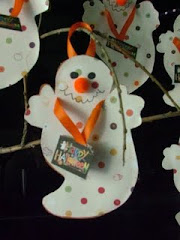
Doesn't it look great in my Witches Kitchen area?
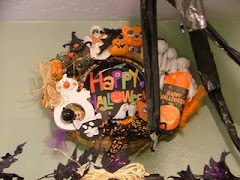
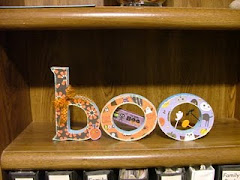
 I was looking through my Halloween Pictures - ready to make a few things and found a picture of a BOO I made last year. I am excited to unpack my boxes to see it again!
This one was made by Michelle - another friend visiting last weekend. YOu cant' see it but she has glitter on all the characers on her boo - so cute!
We ar making a couple more, I will post pictures ASAP.
Create Something Today!
 I love these! I want to take the photo's of our kids when they were little and make these stars for my Halloween Twig tree that is in the Halloween Village - if I have a minute I might try to get to them this year, have to wait and see. www.bhg.com/
 Candy Wreath I found this on a blog and I can't find the address - argh! I am so sorry about that. If this is your's please leave a comment so I can leave a link to your blog.


 hall
hall


