Saturday, October 31, 2009
Tuesday, October 13, 2009
Hope You Have A Spook-tacular Halloween!

I love Halloween - at our house we don't do scary, but we have a great time.
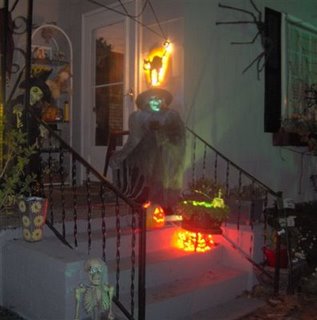
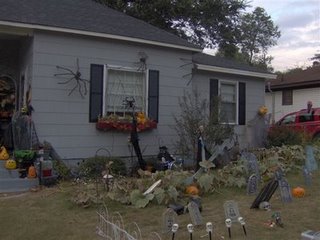
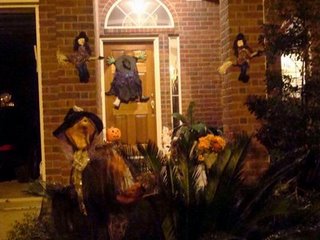
The cobwebs have been strung, the carmel corn is popped, and the costumes are getting dusted off! Here are a few things we have done to help "scare" up some fun at our home!
Monday, October 12, 2009
WELCOME!


 Let's creeep down the hall and go into the dining area....
 Here is Frankie - our Halloween tradition! Isn't Halloween without him!
 From here you can go left in to the terror-ific powder room......(you will be surprised when you realize the curtains here and in the kitchen are made with shredded black plastic bags)......
 If you turn right you will go into the dining/ family area. Our houe isn't haunted but it is fun! We have beoo-tiful decorations (not too creepy). In the dining room is Grandma Mimi's Witches Kitchen. This is a fun place that help the little boys that call us Grandpa and Grandma scream with delight because of goodies they find here and the fun thngs they have helped us make find their home here.
Here is the Witches Kitchen
 A few pictures a little closer up


We are ready to serve sweet treats with just enough spook to delight our Halloween party guests.


Dining Table Cetnerpiece I love "I Spy" vases with all kinds of goodies in them.

I guess it is time for you to go now.......thanks for stopping in. You need to go through the entry on your way out.

BYE!
Spooky Menu and Sweet Treats
Witches Brew
Place a scoop of orange sherbet in a tall glass. Pour gingerale slowly over the sherbet. Serve with a curly straw and spoon.
Harry Potter Butter Beer - looks yummy! Check it out at http://milkandcuddles.com/2010/06/harry-potter-butterbeer-recipe/
 BUTTERBEER RECIPE~
 Ingredients:
- * 1 cup (8 oz) club soda or cream soda
- * ½ cup (4 oz) butterscotch syrup (ice cream topping)
- * ½ tablespoon butter
- *(optional) Heavy Cream
Directions:
Step 1: Measure butterscotch and butter into a 2 cup (16 oz) glass. Microwave on high for 1 to 1½ minutes, or until syrup is bubbly and butter is completely incorporated.
Step 2: Stir and cool for 30 seconds, then slowly mix in club soda. Mixture will fizz quite a bit.
Step 3: Whip Heavy Cream using an electric mixer until thickened, but not completely stiff (about 2 minutes) Spoon over drinks.
Serve in two coffee mugs or small glasses; a perfectly warm Hogwarts treat for two!

1 cup butter
2 cups packed brown sugar
1 cup light corn syrup
1 (14 ounce) can sweetened condensed milk
2 teaspoons vanilla, 8-10 wooden sticks
8-10 medium tart apples
Wash and dry the apples, removing any stems. Insert a wooden stick into the end of each apple. Combine butter, brown sugar, corn syrup and milk in a heavy saucepan. Bring to a boil over medium-high heat. Boil for 30 to 40 minutes, or until syrup reaches 248 degrees (firm ball stage) on a candy thermometer. Remove from heat and stir in vanilla. Dip each apple into the caramel mixture, swirling to coat. DIp apples, while warm place worms all around in caramel and let cool. Set apples on wax paper to cool completely before serving. Yummmmm!
 Invisible Suckers
Makes 1 dozen.
2 cups sugar
2/3 cup light corn syrup
Assorted candies and seeds, such as red and black licorice whips, candy corn, and pepitas (hulled pumpkin seeds)
Line three baking sheets with Silpat nonstick baking mats or parchment paper. Bring sugar, corn syrup, and 1/4 cup water to a boil in a small saucepan, stirring until sugar is dissolved. Don't stir, but occasionally wash down sides of pan with a pastry brush dipped in cold water to prevent crystals from forming; boil until mixture turns golden and registers 300 degrees to 310 degrees (hard-crack stage) on a candy thermometer, 5 to 7 minutes. Working quickly, pour syrup onto baking sheets, forming circles (3 to 31/2 inches in diameter) and spacing pours about 4 inches apart .http://e.marthastewart.com/a/hBI8KNdB7SaHaB7WcB7$UzRuI4Z/recipe.
Melt 1/2 cube butter in saucepan. Add 1/4 cup canned milk and stir. Add 1/2 package of marshmallows and melt. Pour over 12 cups popcorn and stir. Either let sit for carmel corn or form into popcorn balls.
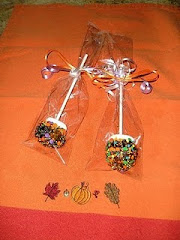
 Marhsmallow Pops are a delight for any "spook-tacular Halloween party.
Put a stick in the flat end of a large marshmallow. Dip the other end in melted chocolate. roll immediatly in small candy or some kind of Hallween sprinkles. Let dry then package in cellophane bags.

Scare up some dipped Rice Krispie Treats.....
Make treats following insturctions on box and let dry well. Cut into squares, spear one end with a popscicle stick. Dip into chocolate that has been melted. Sprinkle with Halloween sprinkles. Let dry and wrap in cellophane bags with Halloween colored ribbon
 Stir up some dipped pretzels.....
Make or buy pretzels. Dip in melted white or chocolate chips. Sprinkle with Halloween sprinkles or mini candies.
 Square Popcorn Balls
I had never heard of these, but we made them and they are a kick! Sure to please all your little ghosts and goblins.

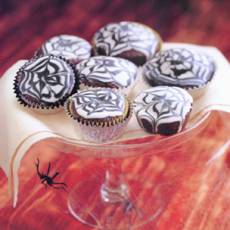
Cupcakes are a great classic!
Make them and frost in your favorite Halloween colors, such as orange, purple and green. Use fun candy such as wax lips and fangs, licorice laces, red hots, gumballs, jimmies & sprinkles, candy corn, gummy worms, and chocolate coins.
Lots of Halloween Cupcake Decorating Ideas Here!
Scroll down for some more yummy treats!
No matter what you do, your family will love all the tricks you do to make them Halloween treats!
Today is a Beautiful day …hope you can enjoy every minute!!!
Our Ghostly Family Party

Spread a magic spell in these t-eerie-fic activities planned for the evening
Pumpkin Carving
Decorating Cookies
Making a Haunted Gingerbread House
Painting Faces
Apple Bob
Doughnuts hung from a string
Annual Relay
Marshmallow Race
Blackbeards Ghost
We will have a terror-iffic time.
We've scared up all the tricks and treats needed for a spook-tacular Halloween Bash!
Halloween Bucket

I am almost finished with it and will post a picture as soon as I am done.
WItches Hat
I saw this over at Pink Paislee and thought it would be a perfect hat to go with my "Witches Kitchen" - it is so cute with everything!

- I used one sheet of 12 inch square paper, it would have been easier with 2, but I did it with one. I cute the strip into 3 inch by 12 inch strips.
- I cut the brim out of another sheet of paper and used a dinner plate for the pattern.
- I had a styro cone so I used it - it is about 15 inches tall. I think it might work better with one of those chip board cones, but either will work.
- I used 3 other paper scraps that were Halloween.
- I used 1 inch ribbon for the bow, a plastic spider, some florist balls, and some spider glitter stickers. You could use anything you have to cutsey it up and embellish it.
Step 2 - The Cone
- After gathering my supplies, I sewed the edge of the strips and the brim with a zig zag on my sewing machine. The paper is purple and the stitch is orange.
- Then I hot glued the paper on the cone, starting at the top and working down.
- Then I glued the cone to the brim.

Step 3 Shaping
- This is a Mod Podge Project - I didn't know that until this step. I realized I needed help to get this to shape and look finished, so I mod podged it everywhere. The one I saw wasn't mod podged and it looks so much better with that on it.
- Then I broke the cone at the top and the paper tore. I cut a little strip of the paper and mod podged over the tear and it is so cute! I curled up the edges of the brim and with the mod podge they stayed up.
Step Four - Embellishing
- I used 3 different papers to embellish with - I had some cellophane so it was the under layer. Then I accoridan floded some yellow paper and glued on top of that. Then I had some dark purple paper and I tore it to giv eit a different edge and wadded it up, soaked it in mod podge and put it on top of the orange and on the brim. (see picture below to see what I mean)
- Then I added berry pick that I cut up, a bow, some glitter sticker spiders, a dangling spider from teh hat and a Happy Halloween Sign. After it was all dry I put a light dusting of irridescent glitter on it - PERFECT!
Doesn't it look great in my Witches Kitchen area?
http://www.%20pinkpaislee.com/
Saturday, October 3, 2009
My Boo Project
 I was looking through my Halloween Pictures - ready to make a few things and found a picture of a BOO I made last year. I am excited to unpack my boxes to see it again!
This one was made by Michelle - another friend visiting last weekend. YOu cant' see it but she has glitter on all the characers on her boo - so cute!
We ar making a couple more, I will post pictures ASAP.
Create Something Today!
Friday, September 11, 2009
Decor I Love - On My To Do List
 I love these! I want to take the photo's of our kids when they were little and make these stars for my Halloween Twig tree that is in the Halloween Village - if I have a minute I might try to get to them this year, have to wait and see. www.bhg.com/
 Candy Wreath I found this on a blog and I can't find the address - argh! I am so sorry about that. If this is your's please leave a comment so I can leave a link to your blog.

This was shared with me by my friend Tamy, an online friend - isnt' it so fun! I have a Christmas Feeder, but not a Halloween one and I love this!
